

A Comprehensive Guide To Creating and Publishing Your First NPM Package


If you've been writing JavaScript long enough, chances are that you'd have used an NPM package in a project at one point or the other. NPM packages are composed of single or multiple JavaScript files which provide simple or complex functionalities that can be reused throughout a project. NPM itself is the default package manager for Node.js which handles the installation, upgrading, configuration, and management of the packages and dependencies of a project.
All of these packages live in a centralized repository known as the NPM Registry and are the handiwork of developers scattered around the globe. This article aims to show you the ropes on how to go about creating and publishing your own NPM package.
What are we going to make?
Programmers that work with frontend libraries like React know that directly modifying the values in a component's state object is a no-go area. This often means that developers have to, first of all, make a copy of whatever value they need from the state into new a variable before it can be used for anything. For arrays and objects, this can be more tricky as JavaScript objects are copied by reference and so, arrays and objects have to be copied more carefully to avoid passing reference to the same state property inadvertently. And with components' state objects usually having properties consisting of nested objects and arrays, trying to decouple and safely copy them from the state quickly becomes a task.
Well, developers can now breathe a sigh of relief! What we're going to be creating is an NPM library that allows us to make perfect clones of objects and arrays effortlessly.
Setting up an NPM Registry account
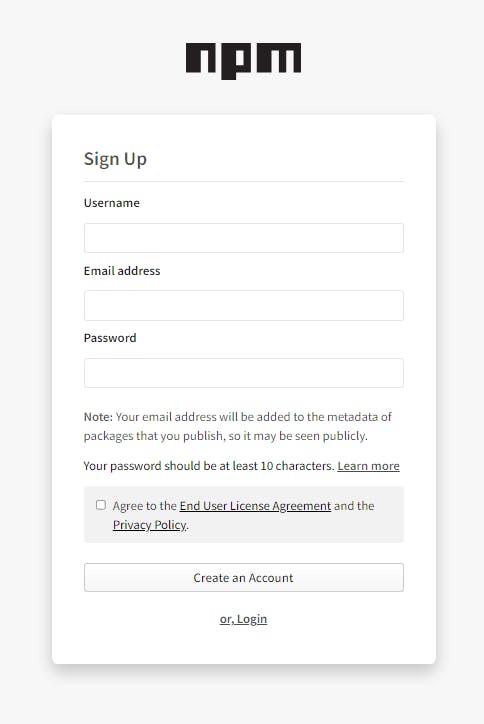
To sign up for an account, click here
1) Click the "Sign Up" button

2) Fill all the fields and click on "Create an Account" (you'd receive an email shortly after). Take note of the credentials you entered as you'd be needing it soon.
3) After receiving the email confirming your newly created account, login to the NPM Registry from your terminal:
npm login
You will be prompted for your username, password and email.
Writing the code
Create a new folder object-cloner in your IDE. Inside it, create a new file index.js and write out this clone function:
function clone(item) {
// Clones an array or object using
// the spread syntax

  return Array.isArray(item) ? [...item] : { ...item };
}
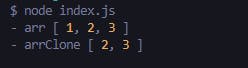
Now, to test that the code is working properly, we're going to add these lines of code to index.js:
let arr = [1, 2, 3];
let arrClone = clone(arr);
arrClone.shift();
console.log("- arr", arr);  // - arr [1, 2, 3]  Original array is unaffected
console.log("- arrClone", arrClone);  //  - arrClone [2, 3]
Next, run the code from your terminal:
node index.js
This should be the output you get:
Seeing as our function works fine, let's remove the last set of lines we added and go ahead to export the clone function with a module.exports statement. Your index.js file should now look like this:
function clone(item) {
// Clones an array or object using
// the spread syntax

  return Array.isArray(item) ? [...item] : { ...item };
}

module.exports = clone;
Whatever you export from index.js is what will be available for importing when the library is installed in a project.
Alright, let's go ahead and publish what we've built.
Package.json
Well, not just yet. Every NPM package requires a package.json file—you can't publish without it. Create a package.json file initialized with the defaults by running this in the package root directory:
npm init -y
The newly created package.json file should contain something like this:
{
  "name": "object-cloner",
  "version": "1.0.0",
  "description": "",
  "main": "index.js",
  "scripts": {
    "test": "echo \"Error: no test specified\" && exit 1"
  },
  "keywords": [],
  "author": "",
  "license": "ISC"
}
Okay, let's take a moment to take note of somethings. Firstly, there's the "name" field which represents the name of the package. It has to be lowercase and MUST be unique; it can't bear the same name as an existing NPM package. You can go to the homepage of the NPM Registry and search to see if there's something by that name already.

If you do want a particular name for your package which happens to be taken already, you could make it a scoped package instead. Scoped packages come in the form @username/package-name, where a package name is prefixed with an NPM account followed by a slash. You should change the package name in your package.json file to something else ("object-cloner" is already taken by yours faithfully) or to this instead:
{
  "name": "@your-username/object-cloner"
}
There's the "version" field as well which, together with the "name" field, make up the two most crucial things in the package.json file. Changes to a published package should be accompanied with changes to the "version" field. NPM follows a versioning system called SemVer, which is short for Semantic Versioning.
The summary of the gist is:
Given a version number MAJOR.MINOR.PATCH, increment the:
- MAJOR version when you make incompatible API changes,
- MINOR version when you add functionality in a backwards compatible manner, and
PATCH version when you make backwards compatible bug fixes.
The "description" field is where we include a succinct description of our package. Also, there is the "main" field which denotes the entry point to our package, which is index.js in our case. The "keywords" field is an array of strings which will be the keywords that are associated with our package and helps people discover it. Lastly, there is the "author" field and this is where we put our name, email and website.
After filling the fields, you should have something like this:
{
  "name": "object-cloner",  // "@your-username/object-cloner"
  "version": "1.0.0",
  "description": "A simple utility library for cloning objects and arrays",
  "main": "index.js",
  "scripts": {
    "test": "echo \"Error: no test specified\" && exit 1"
  },
  "keywords": ["clone", "objects", "arrays"],
  "author": "eedris <alabialade@gmail.com> (https://twitter.com/eedrxs) ",
  "license": "ISC"
}
Publishing
Alright, we can now publish. In your terminal, run:
npm publish
If all goes well, you should see something like this:
npm notice
npm notice 📦  object-cloner@1.0.0
npm notice === Tarball Contents ===
npm notice 176B index.js
npm notice 365B package.json
npm notice === Tarball Details ===
npm notice name:          object-cloner
npm notice version:       1.0.0
npm notice filename:      object-cloner-1.0.0.tgz
npm notice package size:  459 B
npm notice unpacked size: 541 B
npm notice shasum:        e5fdba39cf9ec463a4ec777b9247fd55ce19d3c5
npm notice integrity:     sha512-Pv6n04FnBOd+k[...]V/APMfXSQhaEA==
npm notice total files:   2
npm notice
+ object-cloner@1.0.0
Now, that wasn't so hard, was it? 😎
NOTE: If you decided to publish your package as a scoped package, running
npm publishwill fail and give you an error like this:npm ERR! code E402 npm ERR! 402 Payment Required - PUT https:// registry.npmjs.org/@eedris%2fobject-cloner - You must sign up for private packagesWhy is this so? Well, this is because scoped packages are published privately by default as they are also used by companies (or individuals) to create packages that are used internally. To go around this, we simply have to let NPM know that we are magnanimous people and actually want our scoped package to be available publicly. To do that, we run:
npm publish --access=public
Installing and using the package
Now that we've published our package, let's put it to work. Open up a new folder in your IDE and install the package from your terminal:
npm install object-cloner
Next, create an index.js file and fill it with these lines of code:
import clone from "object-cloner";

let obj = { name: "eedris", id: 123 };
let objClone = clone(obj);
delete objClone.id;
console.log("- obj", obj);
console.log("- objClone", objClone);
NOTE: You may need to include the "type" field in your package.json and set it to "module" to be able to use the import syntax in your code. Check to see if it is already set; if it isn't add it to your package.json:
"type": "module"
Running node index.js in your terminal should give you this output:

We really should give ourselves a pat on the back at this point. We've published, installed and also made use of our package in our code.
Making changes
If you have a sharp eye, chances are that you'd have noticed an issue with our clone function. Whilst it does create clones of objects or arrays, the cloning only goes one level deep.
import clone from "object-cloner";

let obj = { tutor: { name: "eedris", id: 123 } };
let objClone = clone(obj);
delete objClone.tutor.id;
console.log("- obj", obj); // - obj { tutor: { name: 'eedris' } }  😨
As you can see, removing the tutor.id property from objClone also removed it from obj. Since our clone function only goes one level deep, nested objects or arrays beyond the first level still get passed as references and not as fresh copies.
To rectify this, we're going to rewrite our clone function to not only clone, but to deep-clone.
function deepClone(item) {  // renamed to "deepClone"
  //  Deeply clones an object or array

  return JSON.parse(JSON.stringify(item));
}
Remember from earlier that each update to a package has to be accompanied with a change to its version. So, we have to determine the kind of change we made to the package and increment the package's version in a manner that reflects that change and goes in line with the SemVer system. To do that, we make use of the command:
npm version <update_type>
where "update_type" can be either major, minor or patch
We reworked our cloning logic. More pertinently, we renamed the function name and this sort of change makes this new version of our package backward-incompatible. A project that was written using the earlier version of our package will spit out errors if we tried to make use of this new version with it as our package no longer exports the clone function that it relies on. This calls for a major update, so run:
npm version major
Running this takes the "version" field in our package.json file to 2.0.0. To publish the update, run:
npm publish
Drum roll... 🥁🥁
npm notice
npm notice 📦  object-cloner@2.0.0
npm notice === Tarball Contents ===
npm notice 256B index.js
npm notice 365B package.json
npm notice === Tarball Details ===
npm notice name:          object-cloner
npm notice version:       2.0.0
npm notice filename:      object-cloner-2.0.0.tgz
npm notice package size:  504 B
npm notice unpacked size: 621 B
npm notice shasum:        1bb417d5d2cc87aeb1789dbca8b08e1d79af5d37
npm notice integrity:     sha512-/XtyouHWgotLv[...]acqQN1WAZC+9A==
npm notice total files:   2
npm notice
+ object-cloner@2.0.0
Our package is successfully updated! 🥳🎉
Conclusion
We've been able to create and publish an NPM package, as well as make updates to it. We were also able to install it and put it to use.
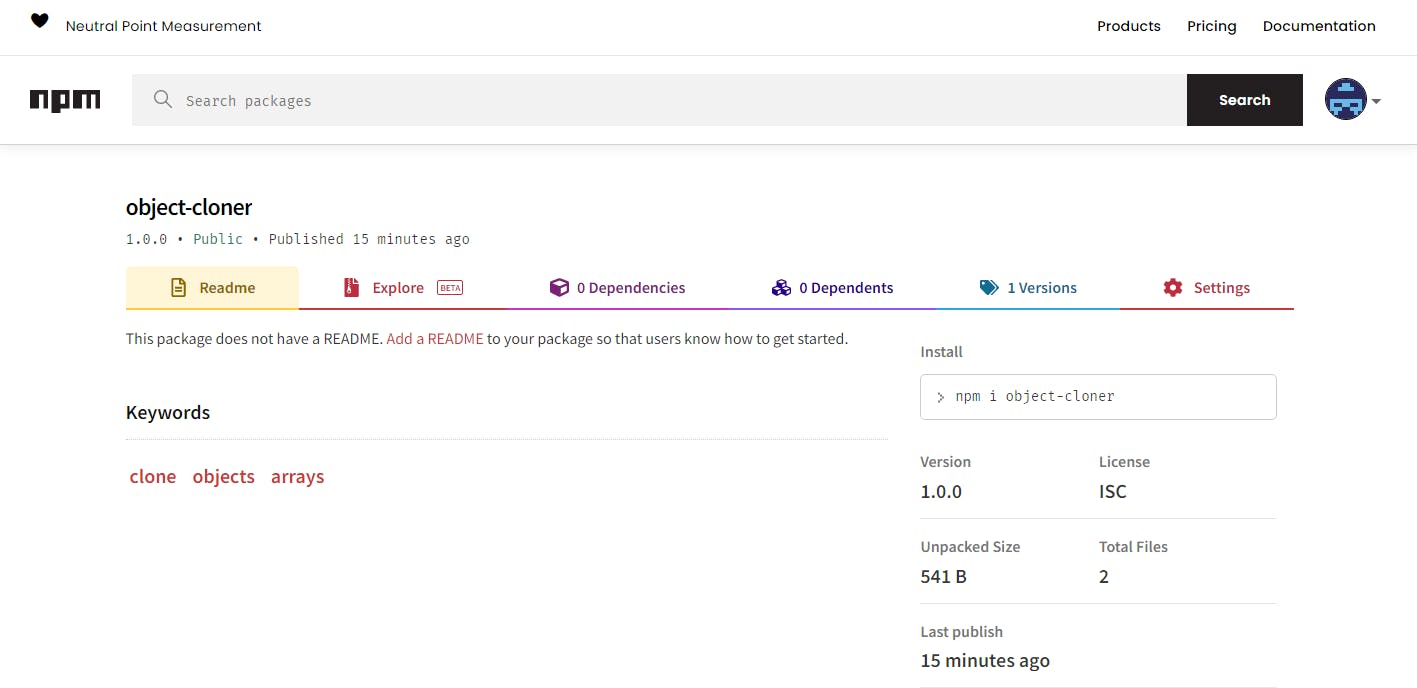
It is recommended you include a README.md markdown file in your package root directory to describe what it's about and also give examples of how to use it. I added a README.md to my package and this is how it now looks on the NPM Registry:

Our package is tiny and definitely not the most sophisticated. However, the primary focus here was about illustrating the process, and not so much about the product itself. NPM packages can be much more grand and more often than not, involve the use of other NPM packages as well. It all depends on the problems you're trying to solve or the functionalities you want to provide.
With all we've done, you should now know all you need to know to start creating your own NPM packages. Thanks for reading!